Listen to this article
Whenever you are taking part in video production, after gathering all of your footage, there’s a simple way to bring it all together and start structuring the ultimate project. The post-production phase is where you really start to see where your effort has come down to and what the outcome is. Below are the general steps you should follow in the Post Production Process.
Import Footage for processing
When it comes to video production, importing footage is one of the first steps in the post-production process. It involves transferring the raw footage from your camera or storage device to your computer for processing. This may seem like a simple task, but it is an important one that requires careful attention to detail to ensure that the footage is imported correctly and safely.
To start the process, you will need to connect your camera or storage device to your computer. You can follow the manufacturer’s instructions to connect the storage device and access its files. Once you have connected to the storage device, it’s time to transfer all the stored footage from your camera to your computer.
There are multiple applications available for importing, managing, and copying data. These applications can recognize all connected storage devices, whether it’s an external hard drive or an SD card, and allow you to easily manage your inputs and outputs. You can link the storage to the computer by drag and drop method or even handle multiple sources quickly at the same time.
The applications designed for importing footage are specifically built for speed and assurance. With the increasing size of video files, other methods of copying are becoming less and less efficient. These applications also provide a checksum copy with a log of failed and completed footage, so you can be sure that your transfer was safe and complete. This is an essential feature because it ensures that no footage is lost during the transfer process.
It’s also important to note that proper organization of your footage is crucial during the import process. By organizing your footage into folders and naming files appropriately, you can easily locate and identify the footage you need during the editing process. This will save you time and make the editing process more efficient.
Overall, importing footage is a crucial step in the post-production process. It’s important to ensure that you have a reliable and efficient method of transferring your footage to your computer, as well as organizing it properly. By doing this, you can save time and avoid any potential loss of footage. Once you have imported your footage, you can move on to the next steps in the post-production process, such as rough cuts, color grading, VFX, and audio.
Backups
Backing up your footage is a crucial step in post-production. It is vital to have a backup plan to ensure that your hard work doesn’t go to waste in case of unforeseen events like hard drive failure or accidental deletion. Losing footage can lead to expensive reshoots, delays, and missed deadlines.
One way to make sure that you don’t lose your footage is to set up a reliable backup system. You can use external hard drives, cloud storage, or other storage options to keep your media files safe. It is essential to make backups on a regular basis, preferably after each day of shooting or editing. This way, if something happens to your original files, you’ll still have access to your footage and other important data.
Another crucial aspect of backing up your footage is organizing your files properly. You can create folders and subfolders for each project and label them according to their content. Renaming files is also helpful in identifying the contents of each file. For example, you can label your footage with details such as the location, date, and time it was shot, and what type of footage it is. This will make it easier to locate files when you need them.
When naming project files, it’s important to label revisions of each project. This will make it easier to identify which version of a project you’re working on, especially when you need to go back to an earlier version. You can add version numbers, dates, and notes to the file names to make it easier to track changes and identify the most current version.
In conclusion, backing up your footage is essential in post-production. It is important to set up a reliable backup system, organize your files properly, and label your project files. By following these steps, you can ensure that your hard work is not lost, and you can continue working on your projects without any interruptions or delays.
Planning Is Key
In the world of post-production, planning is just as important as it is in the pre-production phase. Once the footage has been captured, the real work of shaping the story begins. This is where the importance of planning comes into play.
When you have a clear plan of action, it becomes easier to organize your workflow and keep track of your progress. Without a plan, post-production can quickly become overwhelming and chaotic. You may find yourself spending countless hours trying to figure out the best way to approach a certain scene or struggling to piece together different parts of the story.
Having a solid plan in place before you begin editing will save you time, energy, and potentially a lot of frustration. This plan should include everything from the software you will use to the order in which you will edit each scene. By having a clear roadmap, you can stay focused on the bigger picture and avoid getting bogged down in the details.
Another benefit of planning in post-production is that it allows you to identify potential problems early on. You can identify any gaps in the story or issues with the footage, and figure out how to address them before you start editing. This will save you time and money down the line, as you won’t need to go back and rework parts of the video.
Additionally, planning can help you stay within budget and meet deadlines. By breaking down the editing process into manageable steps, you can ensure that you are making steady progress towards completion. This can help you avoid the last-minute crunch that often comes with looming deadlines.
Proxies
One important aspect of post-production is the creation of proxy files, which can help make the editing process smoother and faster.
Proxy files are low-resolution versions of high-resolution footage that are created to make it easier to edit your video. They are essentially placeholders that take up less space and require less processing power than the original high-resolution files. By creating proxies, your computer won’t have to work as hard to process the footage, which can save you a lot of time during the editing process.
The process of creating proxies can vary depending on the software you’re using, but generally involves a few steps. First, you’ll need to select the footage you want to create proxies for. This can be done in batches or one clip at a time, depending on your preferences. Once you’ve selected your footage, you’ll need to choose the resolution and codec for your proxy files. Generally, you’ll want to choose a lower resolution than your original footage, such as 720p or 1080p, to keep the file size small and make it easier to edit.
Once you’ve chosen your settings, you can begin the process of creating the proxy files. This may take some time, depending on the length of your footage and the processing power of your computer. Once the proxy files have been created, you can import them into your editing software and begin working with them just like you would with the original high-resolution footage.
Creating proxy files can be a game-changer for video editors, as it can significantly speed up the editing process and make it more efficient. However, it’s important to remember that proxy files are not a replacement for high-resolution footage. They are simply a tool to help you work more efficiently during the editing process. Once your editing is complete, you’ll need to replace the proxy files with the original high-resolution footage for the final export.
In conclusion, proxy files are a critical component of post-production, especially for those working with high-resolution footage. By creating lower-resolution versions of your footage, you can speed up the editing process and make it more efficient. If you’re not already using proxy files in your editing workflow, it’s worth giving them a try to see how they can improve your workflow and save you time.
Rough Cuts
Post-production is a crucial process that can make or break your video. After completing the filming stage, it’s time to begin the process of piecing everything together into a cohesive final product. The first step in post-production is to create a rough cut of the footage.
During this stage, you’ll begin assembling the video, throwing footage together to get a sense of the pacing and structure of the final product. It’s important to start the rough cut as soon as possible so that you can get a sense of how the video will look and make sure you have all the necessary footage.
While creating the rough cut, keep in mind the overall story you want to tell and the message you want to convey. You can experiment with different shots and transitions to see what works best for the video. It’s also a good time to start thinking about the audio and how it will complement the visuals.
Once you’re satisfied with the rough cut, it’s time to move on to the next step, which is picture locking. Picture locking is when the video is finalized in terms of its structure and pacing. This means that all the footage has been selected and arranged in the order it will appear in the final product.
Before moving on to the next stage, it’s important to take a step back and review the rough cut to make sure everything is in place. Are there any gaps or inconsistencies in the footage? Is the pacing too slow or too fast? Are there any shots that need to be re-filmed or cut entirely?
It’s important to get feedback from others during this stage to ensure that the video is working as intended. This could include other members of the production team or even a test audience. Taking feedback into account can help identify areas for improvement and ensure that the final product meets the desired outcome.
Overall, the rough cut stage is a critical step in the post-production process that sets the foundation for picture lock. It allows you to experiment with different shots and pacing, and ultimately creates a roadmap for the rest of the post-production process. By taking the time to create a solid rough cut, you’ll be setting yourself up for success in the later stages of post-production.
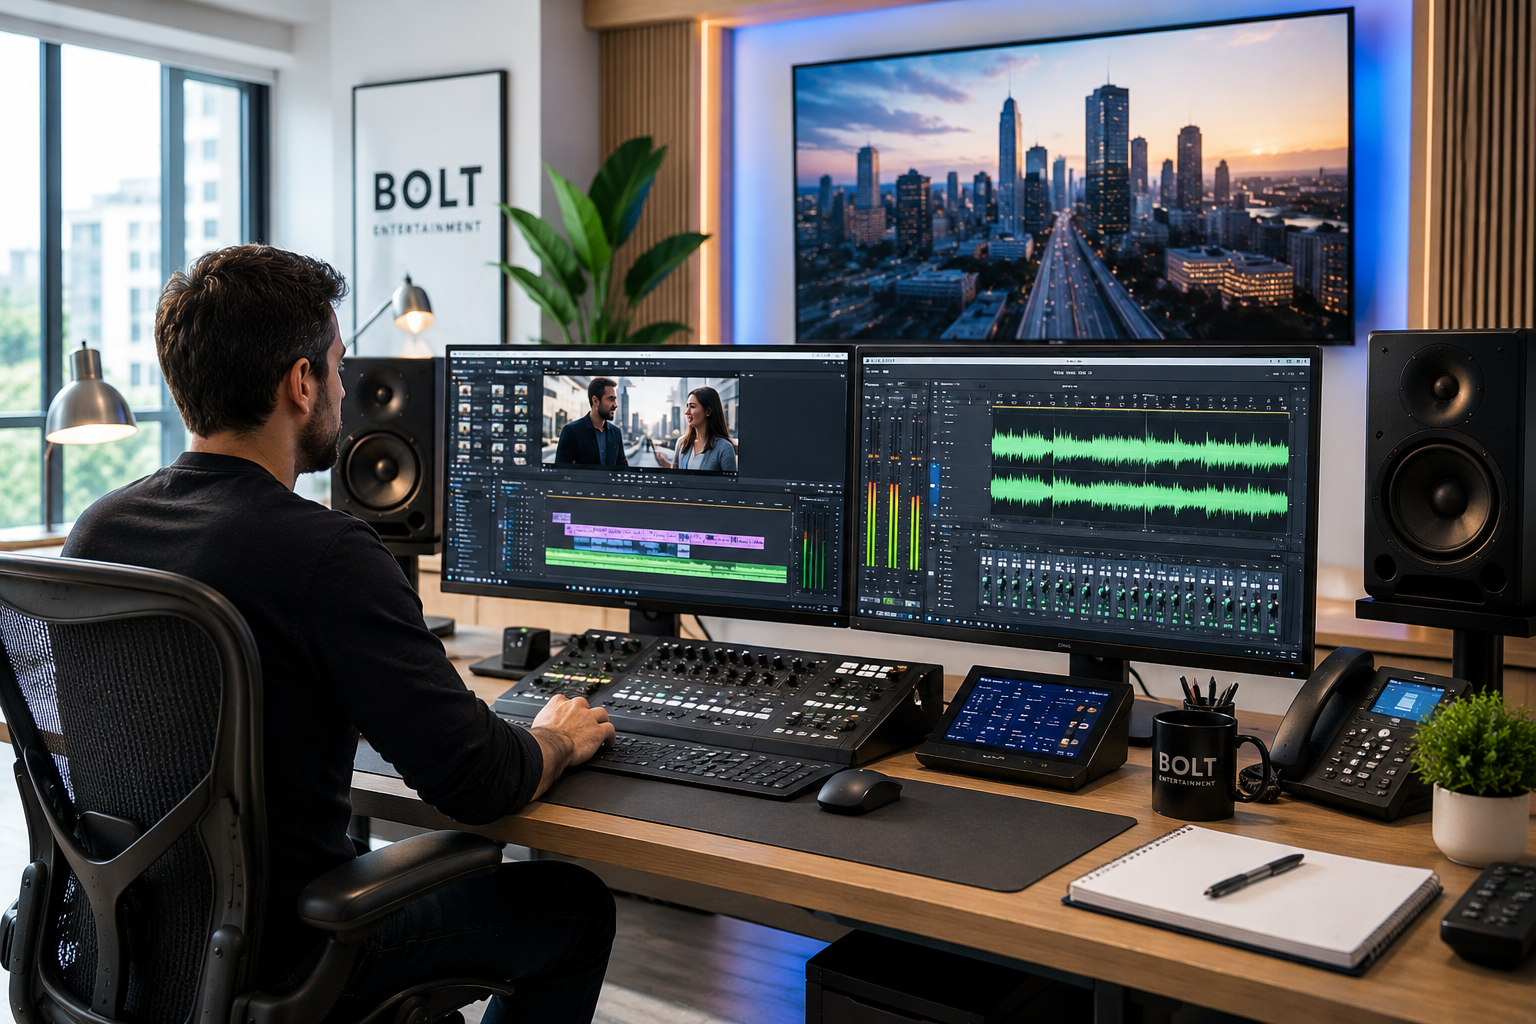
VFX And Audio
In the previous steps, you’ve gone through the process of organizing and assembling all of your footage, trimming it down, selecting the best shots, and creating a rough cut. Now, it’s time to take your video to the next level with post-production magic.
Visual Effects (VFX) can add a whole new dimension to your video, making it more immersive and engaging. With VFX, you can create stunning visual elements such as explosions, light flares, smoke, and more. Adding these effects to your video can help to bring your story to life, and make it more memorable for your viewers.
When it comes to adding VFX to your video, it’s important to remember that the sound design will usually depend on what the VFX looks like. This means that it’s generally not compulsory to produce and implement your VFX before finalizing the audio. However, if you have a specific sound in mind for a particular effect, you can always create and add it in during the VFX stage.
To begin adding VFX to your video, you’ll need to use software that specializes in visual effects, such as Adobe After Effects, Nuke, or Autodesk Maya. These programs allow you to create and add various visual elements to your video, and also provide advanced tools for compositing and rendering.
Once you’ve added your VFX, it’s time to move on to the next step: finalizing the audio. Audio is an essential component of any video, as it helps to set the tone, convey emotions, and guide the viewer through the story. With high-quality audio, you can make your video feel more professional and polished.
To start enhancing your audio, you’ll need to use a digital audio workstation (DAW) such as Pro Tools, Logic Pro X, or Ableton Live. These programs provide advanced tools for editing and mixing audio, and also offer a range of audio effects such as EQ, compression, and reverb.
The first step in audio post-production is to clean up your audio. This involves removing any unwanted background noise, such as wind or traffic, and equalizing your audio so that all the different elements (dialogue, music, sound effects) are balanced and cohesive.
Next, you can start to add audio effects to enhance the overall sound of your video. For example, you might add reverb to create a sense of space or depth, or use EQ to boost certain frequencies and make the audio sound more vibrant. You can also use compression to even out the levels of your audio and make it sound more polished.
By the time you’ve finished adding VFX and finalizing your audio, your video should be almost ready to go. There’s just one more step left: color grading. Color grading allows you to adjust the colors in your video to create a specific mood or style. We’ll explore this in the next section.
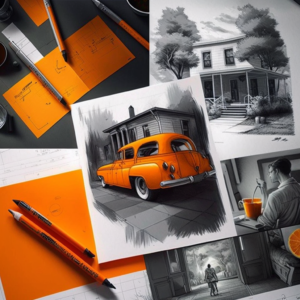
Color Grading
After spending countless hours filming, organizing, and editing your video, it’s time to put the finishing touches on your masterpiece. Color grading is the final step in the post-production process that can truly make your video stand out. It is the art of enhancing or correcting the colors in your footage to give it a consistent and cinematic look.
Before diving into color grading, make sure your picture is locked, visual effects have been added, and the audio has been finalized. This ensures that you are working with a polished video that’s ready for color grading.
The first step in color grading is creating a standardized light/dark balance. This involves adjusting every clip so that the whitest white and blackest black are essentially at the same values. Using a waveform monitor, which is available in most video editing software, you can see the objective amount of light coming off of your project. By adjusting the brightness and contrast of each clip, you can achieve a consistent look throughout your video.
Next, regulate your white balance to objective white. Using an RGB parade scope, you can see the objective color values of your footage. The goal is to adjust all of your colors so that they read as white as possible. This creates a neutral base for your color grading and ensures that your footage is not too warm or cool.
Now it’s time to find an overall visual style that you like and start modifying the colors in your video to line up with that. This is where the magic happens and where you can truly enhance the mood and tone of your footage.
There are many creative possibilities when it comes to color grading. You can make your footage look vintage with warm, yellow tones or create a futuristic look with cool, blue tones. You can also use color grading to enhance the emotions of a scene. For example, you can make a happy scene look warmer and brighter or make a sad scene look cooler and darker.
The key to effective color grading is to use it to enhance your footage, not to distract from it. Avoid overdoing it with extreme colors or effects that take away from the story you’re trying to tell.
Once you’ve found a color grading style that you like, you can apply it to your whole film. This ensures that your video has a consistent and professional look throughout.
Finally, after all of this hard work, you have reached the final step where your masterpiece is ready to present to your audience. Export your video in the appropriate format and resolution for your intended platform, and get ready to share your creativity with the world.
Final Cut & Deliverables
Congratulations, you’ve made it to the final step of the post-production process – the Final Cut and Deliverables. This is where you bring all of your hard work together and create a polished, finished product that’s ready to be shared with your audience.
At this point, your video is essentially complete. All the pieces are in place – your footage has been captured, your audio has been cleaned up and mixed, your visual effects have been added in, and your colors have been graded. All that’s left to do is put it all together and export your final cut.
When exporting your final cut, you’ll want to make sure that you’re choosing the right settings for your intended delivery platform. Whether you’re sharing your video on YouTube, Vimeo, or another platform, you’ll want to make sure that your video meets the required specifications.
It’s also important to consider the format and resolution of your final deliverable. You may need to export multiple versions of your video to accommodate different devices and platforms.
Once you’ve exported your final cut, make sure to take the time to review it one last time. Watch it through from start to finish to make sure that everything looks and sounds the way you intended it to.
Congratulations on seeing your concept through from start to finish! By following the post-production process outlined in this guide and taking the time to plan, organize, and back up your footage, you’ve created a video that you can be proud of. Now it’s time to share it with the world and watch it shine!